Posts

The Reflection

Image
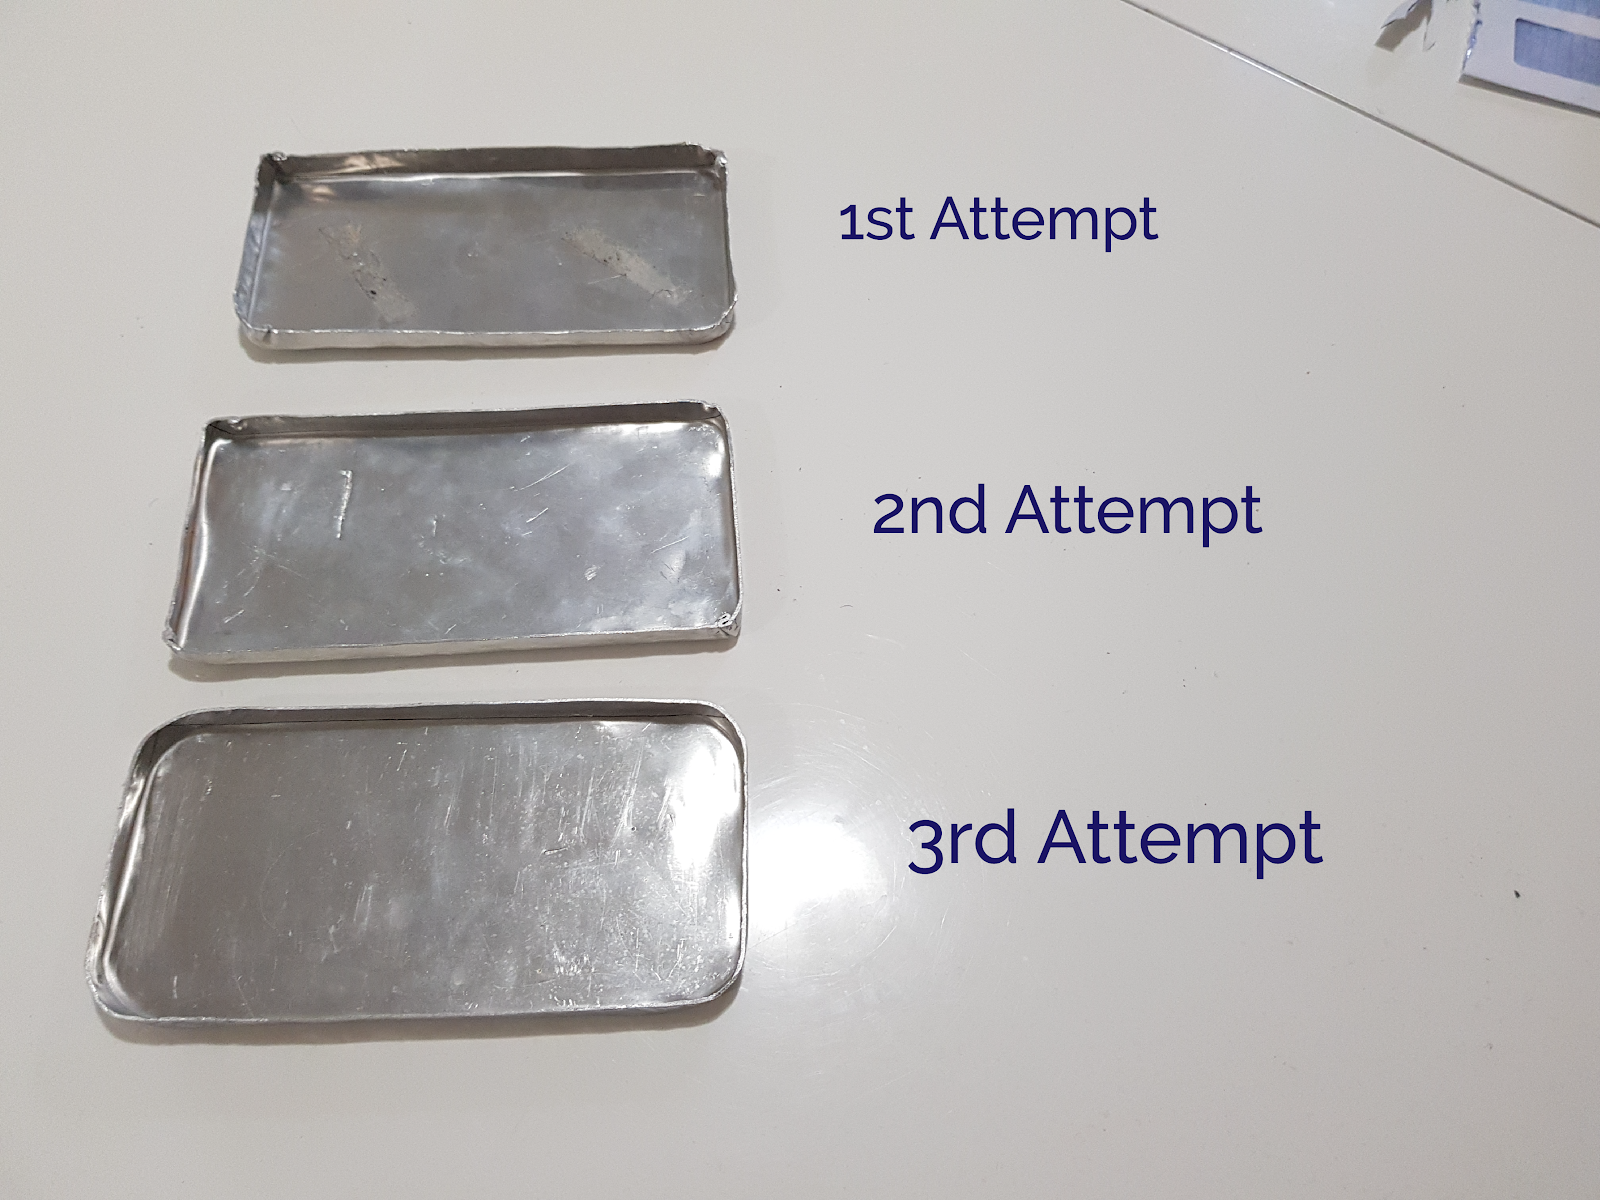
As an Industrial Design student, model making is model making is no stranger to me, however, I've only touched metal once throughout my studies and it was just a simple cutting and bending of a 0.5 mm aluminium. The rest of the times, we usually made models from blue foams, 3D printing, and wood works, which is why metal working in this class felt like a whole new world. Throughout this class, I have learned new things and skills on metal shaping, which will be helpful in future model making especially where metal is involved and metal is quite common in product design.  For this critical review task, I chose to review the tray, as it is the one i found most difficult, and took me the most tries to nail it. The Tray The tray was the most difficult task for me, even more than the tank in my opinion. There's so much room for errors with the tray compared to the tank.   The tray took a total of 3 tries before i got a decent one.  1st Attempt From a

The Fuel Tank - Gallery

Image

The Fuel Tank - Phase 4: The Banging

Image
Phase 4: Forming the Tank With the template done, the next thing we did was dividing the model into three parts with similar size and difficulty. This took a while but we ended up with this division   As no one wants to do part 1 as it is the biggest and relatively the most difficult, we decided to do a raffle. In the end i ended up with Part 1 along with Jin and Zoey Part 1: Me , Jin , Zoey Part 2: Zeran, Tauqir, Ben Part 3: Lornia, Kelvin, Natalia With the parts assigned we then proceed on deciding how to apply the pattern to the metal sheet. Our part 1 group; Jin, zoey, and Me decided to do the blister for the overall shape before free forming it using techniques we learned from the previous assignment. The Blister To make the blister, we decided to measure where our parts are going to meet on the model and laser cut that slice and trace it onto a piece of wood then using the jigsaw to cut

The Fuel Tank - Phase 3: The Template

Image
Phase 3: Creating the Laser Cut Template With the file ready, we started to laser cut the template with 2.6 mm gap.   We then attempt to put the pieces together However we found that 2.6 mm gap is too tight for the whole template, we found it worked for the test we did as it was just a small piece, with the fuel tank template however, we found that the bigger the piece is the harder it is to fit. We learned that 2.6 mm results in no tolerance, which results in the pieces began to split and snap as we tried to fit them in.  Our failed attempt (sad reacts only) Daniel suggested that we are better off with the material thickness of 3 mm  or even 3.5 mm for the gap, yes it would be wiggly but we can use glue gun to solidify it.  Our 2nd attempt we did just that; laser cut a template with 3.5 mm gap and assemble it using glue gun to stick the pieces together This time it assemble a lot easier than before. After Kelvin, Tauqir,

The Fuel Tank - Phase 2: The Rhino File

Image
Phase 2: Preparing the Laser Cut File We thought that preparing the file for laser cutting is gonna be a breeze, we thought wrong. The file provided by the course blog is a Rhinoceros 3D file, not a single person in our group is familiar with the software with the exception of Taquir, however we still couldn't figure out how to prepare it for laser cutting.  As Industrial Design students, we know how to prepare a file for laser cutting; export as STL file and import it into a slicer which slices the file into different parts. However we couldn't export the Rhino file at all. With the help of Martin, we figured out that the issue is that the file is missing important data that made the model undefined.  Everyone being confused (even people from other groups) As the other groups who chose the same fuel tank experienced the same problem, Russel decided to help. With some magic Russel managed to fix the file using Grasshopper (Rhino Plugin) and then exported